
Hey, Siavash here with another ‘how to’ tutorial. In this one, I’m going to show you Step-by-Step How to Create a Facebook Pixel in Facebook Business Manager.
Don’t worry if you don’t have any clue what Facebook Pixel is and how it works. I’ll show you step-by-step how to do it. We start by creating a Facebook business account. Then we continue by setting up our billing inside the Facebook business setting. After that, we create a Facebook Pixel. For those of you that don’t know what Facebook pixel is: Facebook Pixel, is simply, a piece of code that you attach to your websites and funnels, and it allows Facebook to track your visitors. This gives you a lot of power in knowing your visitors/audience better.
Table of Contents
How To Create Facebook Pixel – Facebook Business Manager
For those of you that don’t know what How To Create Facebook Pixel is or they don’t have it and they never had a Facebook business manager.
This is the website that you want to go here, so you need to be signed in to your Facebook profile account and then jump in and click on create.
Once that is all set up and done, you will have access to your business account which you can go from the Facebook Business website.
Once you join in and sign In, click on the business settings and you will see something like this.
Facebook Pixel – Ad Account
All right and here you always want to make sure that you’re accessing your business settings. You’re not accessing anything else like your personal account.
If it’s your first time, you probably don’t have any AD account, so you go ahead and click on ad accounts and you make sure that you go ahead and create a new ad account.
So right now, because I’ve already had an ad account, it doesn’t allow me to create a new one.
You should be actually able to create one if you don’t have any.
Click on add, click on create a new ad account and just follow the steps at the end of the steps it asks you about the payment information.
As you can see, because I’m doing a test for you, there is no payment method on this ad account at the moment.
Once that is set up the next thing that we want to do is that we want to create our pixel.
How To Create Facebook Pixel
So the Pixel is going to be on the left-hand side. Click on data sources and you click on a pixel.
What is Pixel?
Now, what is a pixel? so the pixel is basically is a piece of JavaScript code that Facebook generates for your account and you can basically put it on any type of website that you have and Facebook starts tracking.
However, it depends on what you want to track.
So for example, in this scenario, because we want to track conversions, you want to put the actual Facebook pixel on our funnel that we created in the previous session.
So when we put that pixel on our funnel Facebook grabs the information of people that are viewing our funnel plus people that actually sign up and then buy the product.
Alright, so this is what’s going to happen. once you find some people that are actually showing interest and signing up to your funnel, then Facebook goes ahead, based on that pixel, find other people that have similar interests and start showing your advertisement to them as well so it keeps optimizing the ad based on the interests of the people who act on your ad.
Facebook Pixel Benefits
The other benefit of that is once you start getting some customers and feeding Facebook Pixel with some data then there are a couple of other things that we can do.
We call them creating custom audiences or retargeting audiences.
so you can actually, specify the type of interest/people and tell Facebook: OK, I want to specifically retarget these people.
I’m sure that you probably have seen it.
It’s kind of like wherever you go, some ads actually following you on different platforms like Facebook, Instagram. So this is basically what Facebook pixel does.
Let’s create your pixel code.
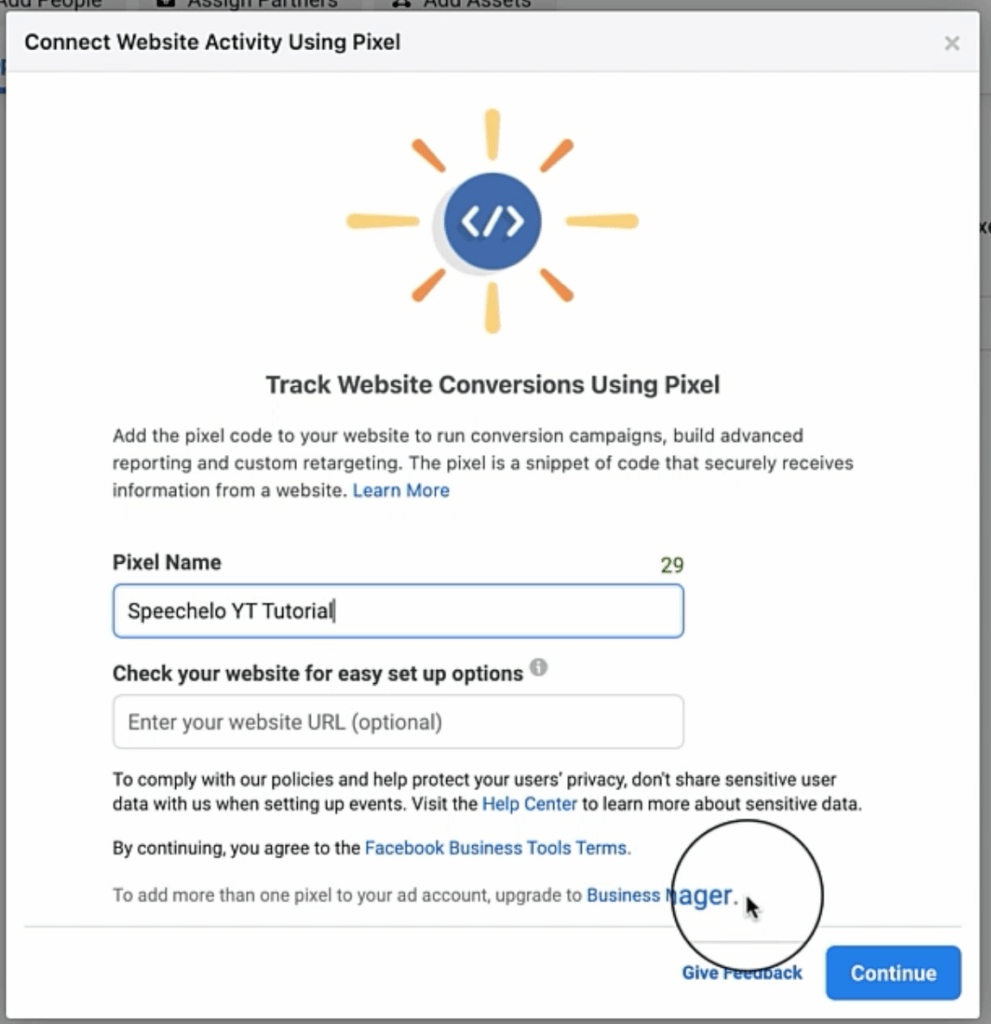
So you just go ahead and click on add. Then This comes up.
You give it a name, in this case, I’ll name it Speechelo. For the purpose of this tutorial you don’t need to give it a website, you just hit continue.
Now I want to Manually add the pixel code to the website so we click on that option.
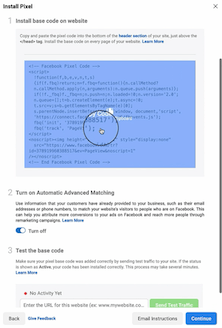
On the next screen, We want to click on copy to clipboard, copy the code to the clipboard so now it’s copied
We want to make sure that it’s turned on automatic selection, so these are the things I want to track at least cover the bases.
We don’t want to put the URL in here and click on continue. And on the last pop up click on cancel and that’s it.
As you can see, it is red and it’s because first of all, it doesn’t have any people associated with that. So you click on add people.
And you probably want to add a person that is working with you. So in this case it’s me. Turn this on and then click on the sign.
Final Thoughts
That’s done, the other thing that you want to add is to go to connected assets. As you can see, there are no assets we want to attach to an ad account.
To this pixel, so we click on add assets and we choose our add account and add it to this specific pixel is ready.
The only reason that it’s showing red it’s because there has been no activity yet.
All right that’s how you set up your Facebook Pixel.
In the next section, I’m going to show you how you can add that pixel and install it to your website or in our case funnel. Stay tuned.
Want To Learn More?
Get access to our 1-on-1 coaching training program.

I’m real and want to help you, so please follow me on social media below.
Follow me on my social media below.
Subscribe To My YouTube Channel Here.
Think Rich and see you at the Top!